Pages

Edamame Pâté

It's the end of the month and as my fridge becomes emptier and emptier I find myself getting creative with the items I've yet to use. This time around, the challenge was a forgotten bag of frozen shelled edamame.
Frozen edamame is a great thing to keep on hand. The in-shell variety makes a healthy snack fit for any occasion while the shelled edamame is handy for tossing into stirfrys, salads, or in this case, blending into a unique condiment.
I've tasted commercial edamame pâté and am never pleased with the results. I often find them over-seasoned or sometimes convoluted in flavor. This recipe creates a mild and delicately flavored spread that is easily paired with both asian as well as italian cuisine.


Edamame Pâté
  • 1 Cup frozen shelled Edamame
  • 1/4 Cup Pine nuts (I didn't have any on hand when I photographed this so I substituted cashews)
  • 3 cloves Garlic
  • 1/2 Cup fresh Parsley
  • 1 Tbl fresh Lemon Juice
  • 1/3 Cup Olive Oil
  • Salt to taste


1. Boil frozen edamame for 5 minutes till tender.


2. Meanwhile, roughly chop your garlic and parsley.


3. Drain edamame and rinse with cold water to cool.


4. Combine edamame, pine nuts, garlic, parsley, lemon juice, and olive oil in a food processor and blend thoroughly. The texture will be creamy and a bit gritty. You can add a tiny bit of water to make it smoother. Blend in salt to taste.


Edamame Pâté makes a wonderful spread for bread and crackers. The mild flavor makes it an innovative filling for tea sandwiches but the high quantity of garlic also makes it work with most basic sandwich ideas. It is also delicious tossed with noodles and served at room temperature. Try tossing with bow tie pasta and peas or  mix into soba noodles and top with sesame seeds for a delicious side dish. You can also top a salad with a dollop. The rich green color brings flair to a variety of dishes!

Makes about 1 1/2 cups

The Scrap Bowl


To keep your counters clear while you cook, try keeping a scrap bowl handy. It saves you many trips to the garbage. 
Toss anything unusable in the scrap bowl: veggie tops and stems, peelings, rotten spots, etc.
After you finish cooking, toss the whole lot into the garbage/compost or rinse and add to your stock bag (which we'll talk about later).

Summer Fooding

Audrey Hepburn and Gary Cooper 1956

The days are getting longer and I'm looking forward to eating more summer foods with the anticipation of warmer weather. Cold noodles and soups and wonderful salads and fresh fruits. I've been keeping ice tea in my fridge which is easy to make in my vintage thermal pitcher that goes from hot to cold. I am hoping to get in a few picnics this year with my plastic picnic set from the early 1960s. I'll be posting soon about fresh rolls, homemade peanut sauce, and other summer goodies. 
What are your favorite summertime foods?

Make it your Own: Nachos!

Ever since my boyfriend moved in I've been finding myself serving more and more dude food for dinner. You know, pizza, nachos... My boyfriend gets more excited about mac and yeas' casserole than he does about say, african groundnut stew on bulgar. Luckily, I feel equally excited about both.
Even though the quickest junk dinners come from the frozen aisle at the grocery store, I find that many of them are nearly just as fast to throw together from home.
Thus, I present my quick and healthy nachos. A bag of chips provides a satisfying base for a can of beans, a couple handfuls of (vegan) cheese, and the fixin's are anything I have on hand in the fridge. Assembling them takes as much time as the oven does to preheat and they are a great way to use up leftovers such as rice or small bits of vegetables I might have lying around. The best part is, they are healthy! And much more fit for a meal than their traditional "nacho cheez sauce" smothered counterparts, don't you think?


1. For nacho night, pre heat the oven to 400 degrees and spread several handfuls of your favorite salted tortilla chips out on a baking sheet.


2. Chop up your fixin's! Nachos are a great way to use up random vegetables or leftover items in your fridge. Here are some of my favorites:

  • diced bell peppers 
  • chopped red onion
  • chopped scallions
  • diced tomatoes
  • chopped black olives
  • shredded cabbage
  • grated carrots
  • grated or diced zucchini 
  • leftover cooked rice
  • leftover cooked beans
  • minced garlic
  • diced jalapeno
  • chopped cilantro
  • diced avocado
  • cubed or crumbled fresh tofu
  • crumbled veggie burgers or your favorite mock meat

Toss on as many of these as you like. Chances are, you have quite a few of them around the kitchen. Make sure they are evenly spread over the bed of chips.


3. Open a can of your favorite refried beans. I prefer black refried beans but here I am using regular pinto. Empty the contents into a bowl and add about 1/3 cup of hot water.


4. Mix well and spread over your bed of chips. The water allows the beans to be distributed more easily. 


5. Cover the whole mess in grated (vegan) cheese. I like Daiya brand because it melts. Try the cheddar or the pepper jack. Or combine several.

6. Bake for about 7 minutes until the (vegan) cheese melts. Check it here and there. You don't want to burn your chips!


7. Serve hot with your favorite dips. I made fresh guacamole and also fresh roasted salsa using this recipe.

I make about these every other week. I store (vegan) cheese and commercial salsa in my freezer so I can toss these together any time I need to. Everybody loves nachos! And if you don't, get out.

Freeze it: Green Beans

Lately I've been buying massive bulk bags of green beans the size of my head from Viet Wa and freezing them. This way, I have fresh green beans all month long! I hate feeling especially rushed to use up produce but freezing it makes it so I can relax. Here is your first freezer lesson.


1. Trim your beans and then rinse them in a colander. Compost the end bits or add them to your stock bag.


2. Bring a large pot of water to a rapid boil. Add the beans and blanch them for 3 minutes. Blanching means to boil only for a moment. It is a method of par-cooking. If the beans take up most of the space in your pot, rotate them continuously with a pasta spoon. They will still be firm when they are done but the outside will have turned a brilliant green.


3. Working quickly, drain the beans in a colander and transfer them immediately to an ice bath. Ideally, an ice bath is a large basin of ice water. The purpose of this is to stop the cooking process. If the beans overcook, they will become mushy in the freezer.


If you don't have a large basin or ice cubes on hand (oops!) then do what I did. Fill a large bowl with ice cold tap water and transfer the beans to that. Then, holding the colander on top of the bowl, run cold water through it from the tap. The continuous flow of cold water will cool off the beans fast and the colander will hold them in.


4. Once your beans have cooled, transfer them to a towel and pat them dry. Excess moisture in the means will allow them to collect frost making them mushy.

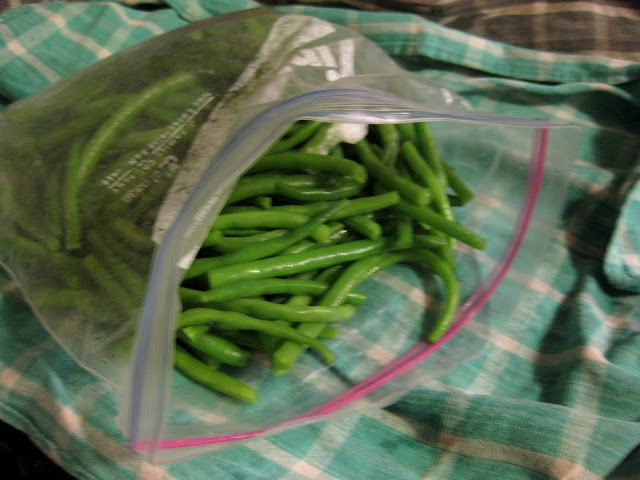
5. Once they have been semi dried, toss them into a freezer bag. Don't fill the bag too much. If you need to, use two. Crowding will cause them to stick together during freezing.


6. Freeze it! Make sure you lay the bag flat on it's side during freezing so you can spread out the beans a bit. This will help prevent excess sticking or ice build up from moisture leakage. Once frozen, shake the bag a big to unstick any bean clumps.

Apparently, green beans can last up to a year in the freezer, but I like to use mine up within 2 months or less. Never thaw your beans before adding to recipes or they will become watery. Remember, your beans are par cooked so they will cook faster in recipes than raw.

Add your beans to stews during the last 5 minutes of cooking. You can stir fry or roast your beans by tossing frozen beans with oil and cooking with high heat to brown them. You can also boil or steam them but keep watch that they don't over cook.

And remember, the freezer is your friend.