Pages

Showing posts with label recipe. Show all posts

Beet Greens

A friendly reminder to hold on to your beet greens! Beet greens resemble red chard in both looks and taste. Don't let them wilt in your fridge! Once home from shopping, cut the greens loose leaving about an inch of stem still attached to the beets. You may store the greens in a plastic bag with a folded paper towel for several days if they are in good shape.


Beets cooked with their greens are a wonderful combination. The sweetness of the beets play off the peppery bitter notes in the leaves creating a wonderfully balanced side dish that needs minimal seasoning. 
Here's a quick way to cook them inspired by my Grandma: Saute thinly sliced beets in a little olive oil and garlic for 3 minutes over medium heat. Slice or tear your greens into pieces, wash, and add wet greens to the pan with a twist of sea salt. Cover and cook for 5 minutes until wilted.


1 bunch beets with greens serves 3-6

Bacon-Fu

That's right. Bacon-fu. Bacon-fu started as a joke and the idea of bacon flavored tofu is still one I can't take seriously which is exactly why I gave it such a stupid name. Nevertheless, this is one addictive recipe. Believe me. Anyone will eat this tofu including your boy friend. Baking it fills the whole house with a irresistible sweet smokey smell. Pop it in before your lunch guests arrive and you are sure to win them over.

Ingredients:

  • 1/4 cup soy sauce
  • 2 cloves garlic, chopped
  • 1 Tbl nutritional yeast
  • 1 Tbl brown sugar
  • 1 Tbl olive oil
  • 1 tsp cider vinegar
  • 1/2 tsp paprika
  • 1/2 tsp liquid smoke
  • 1 16 oz package tofu


1. Preheat oven to 375Slice your tofu lengthwise into 1/4 inch thick strips. Drain if needed.


2. Lay tofu in rows onto a large non stick pan.


3. Mix all ingredients in a food processor until blended. If you've never tried liquid smoke before, this is a great introductory recipe. It comes in small bottles and really packs a punch so use it very sparsely.


4. Using a pastry brush, paint thick layers of marinade onto each tofu slice. Turn the slices over and paint the other side. Try to use up all the marinade letting it pool up on top of the tofu slices.


5. Bake the tofu for 10 to 15 minutes on each side. The sugars in the marinade will burn easy so keep watch on it as it bakes.


Pile bacon-fu in a sandwich, crumble into a salad, or simply enjoy hot out of the oven! Enjoy your bacon flavored tofu: crispy bacon-fu!

Tomato, Fennel, and White Bean Stew

Here is an incredible stew that is delicious any time of the year!
The original recipe came from a canadian cookbook handed down to me by my Grandfather. It become a bit tweaked over time and I've been known to swap ingredients in it to suit what I have in my fridge but here it is in a more or less pure state.
The versatility of this stew is in the ingredients. In the summer I make it from fresh tomatoes while in the winter I stick to canned. In the summer I top it with fresh basil whereas this time of the year I garnish with fennel fronds. For lunch I eat it with a slice of crusty bread. For dinner I serve it atop pearl barley for a more filling dish. Plus if your looking for a good way to use up extra cranberry beans, you're in luck here.

Ingredients (Adapted from The Essential Vegetarian Cookbook): 
  • 5 tomatoes, diced OR one 32 oz can whole tomatoes, diced
  • 1 large fennel bulb washed and thinly sliced
  • 2 leeks, washed and sliced
  • 2 medium red skin desiree potatoes cubed
  • 1 1/2 cups prepared white beans of any variety
  • 2 cloves minced garlic
  • 1 bay leaf
  • 2 tsp thyme
  • 1 tsp fennel seed
  • 1 cup vegetable stock
  • 3/4 cup white wine
  • 3 TBL olive oil
  • salt and pepper
  • fresh basil or fennel fronds for garnish


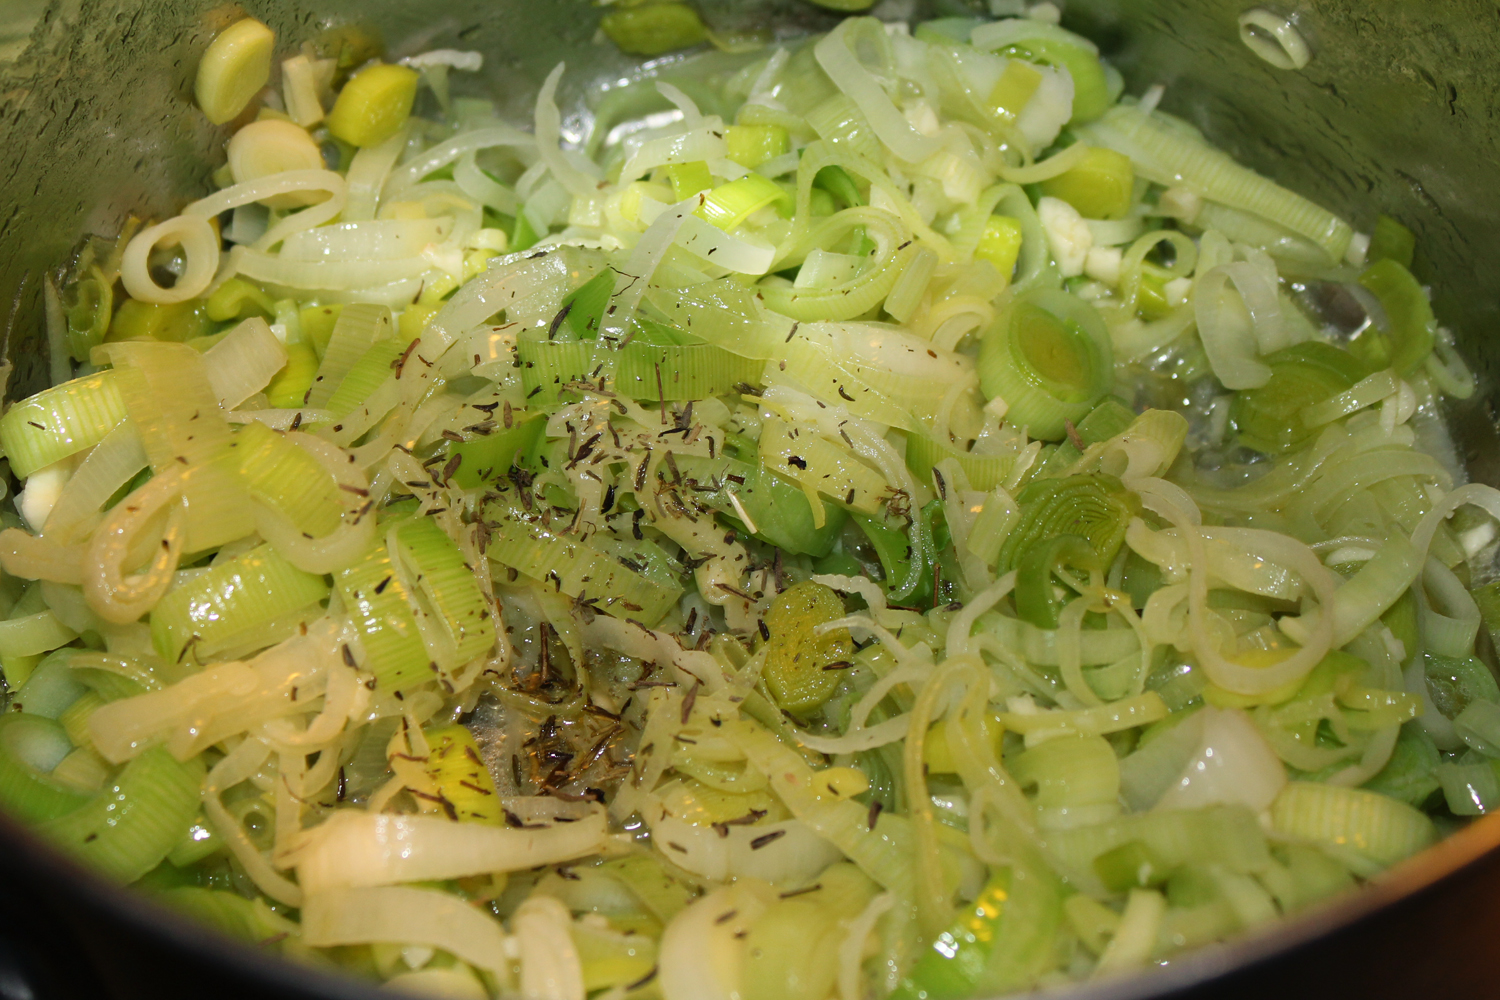
1. Saute the diced leeks in olive oil for 7 minutes over medium heat until soft.


2. Toss in the minced garlic and saute 1 minute until fragrant.


3. Season the softened leeks with the thyme and fennel seed and about a tsp of salt.


4. Stir in the sliced fennel, potatoes, beans, and tomatoes (plus juice if using canned). Pour in your vegetable stock and mix well.


5. Bring to a boil. Reduce heat and simmer partially covered for 20 minutes until potatoes begin to soften. The tomatoes will release their juices and the stew will turn a vibrant red orange.


6. Uncover and stir in the white wine. Taste the stew and add salt and pepper to taste. Continue to simmer uncovered for 10 minutes.


The beauty of stew is that it sits somewhere between a soup and a saute. The result of this stew will be a hearty vibrant mix of protein, starch, and wonderful flavors in a bright oily savory broth. Garnish with basil or fennel fronds and enjoy on a rainy afternoon or a chilly evening.

This stew also freezes wonderfully. Allow it to cool completely before freezing it in marked containers for next weeks lunch.

Serves 4-6

A New Spin On Pasta

I've been reading this wonderful book that I recommend everyone check out called Eat Good Food put out by San Francisco's Bi Rite Market. It's basically a food bible that walks you through how to properly buy, store, prepare, and eat a myriad of different household staples.
One of the many things that caught my eye in the book was an interesting technique of cooking pasta that involves finishing the  still firm noodles in the tomato which allows for a heartier and more flavorful finish. After reading about it I decided to give it a shot with some left over marinara I had cooked up a few days earlier. Wow! Was it ever good! My sauce was richer, my noodles were chewier, and the ingredients seemed to marry in ways I never considered before. I thought I would walk you through the process so you can try it during your next boring old pasta night.

You will need:

  • A package of your favorite pasta
  • A quantity of pre made tomato sauce
  • A measuring cup


1. Bring a large salted pot of water to a boil. Add pasta, stirring to separate noodles and let boil over hight heat.


2. Let pasta boil about two minutes less than the package instructs. You want your noodles to still be slightly stiff. Lift a few from the pot to check them. Take a bite if you're not sure. The center should still be hard.


3. Before draining your pasta, dip a measuring cup into the pot and reserve about 1/4 cup (or more depending)of the starchy salty cooking water. Set aside and drain pasta as usual.


4. Turn the stove to medium high, add the sauce to the pot and heat thoroughly. Then, add the undercooked noodles and about a third of the reserved water. Stir to coat noodles and let the sauce and water mix and boil rapidly. Gradually add more water as the liquid thickens.

The idea is that the pasta absorbs a bit of the saucy liquid during its last moments of cooking. The starchy water thickens the sauce while the well rounded saltiness adds to the dish.


5. The finished product should be thick and hearty perfect for a cozy december night in. A simple technique for amping up a familiar dish. Bon appetite!

Mac N' Yeas' for Everyone!

Vegan Macaroni and Cheese is a tricky thing. The big idea behind most vegan mac is a nutritional yeast based "cheese" sauce that is then mixed with the macaroni. I've seen "cheese" sauces made with everything from oats to tahini but none go without the addition of nutritional yeast which you can find in the bulk section of most health food shops. It has a naturally cheesy flavor and it adds a creamy texture when mixed with liquids. Unfortunately, the problem that I encounter with most with vegan macaroni and cheese is that many recipes tend to go a little heavy on the nutritional yeast. I find that yeast in excess, lends an almost bitter metallic flavor to foods. It can also dry out your sauce if you use to much. Your final result may be edible but probably only to you...
Here is a recipe worthy of a comfort food craving. It is creamy, flavorful, and surprisingly light on the yeast! This recipe wont truly shine until it's baked making it a strictly casserole mac but, if you ask me, thats really the best way to enjoy any mac and yeas (or cheese for that matter).
Growing up, macaroni and cheese casserole was a staple at dinner. I'm proud to say that not only do I think this recipe tastes nearly identical to my mothers, my mom agrees! She even asked for it on Mothers day!
Do yourself a favor. Make this dish. Then, thank me in the comments below for sharing one of the best recipes in my collection with you.
Recipe adapted from here.

 Mac N Yeas
  • 1/4 Cup Margerine
  • 1/4 cup Nutritional Yeast
  • 2 cups plain Soy Milk
  • 1/4 Cup plus 1 tbl White Flour
  • 1/4 cup Corn Starch
  • 1 cup Water
  • 1/2 tsp Dijon Mustard
  • 1 tsp Paprika
  • 1/2 cup Bread Crumbs
  • 1 tsp Salt plus more to taste
  • Black Pepper
  • 3/4 cup diced Yellow Onion 
  • 2 1/2 cups dry Macaroni pasta   

1. Boil macaroni in a pot of salted water. Drain and set aside.


2. While pasta is cooking, combine the nutritional yeast, flour, cornstarch, paprika, and salt in a bowl and whisk until blended. Dice the onion and set aside.


3. Preheat oven to 400 degrees.
4. Heat soymilk on the stove over medium high heat. Add in water, margerine, and Dijon, and bring to a boil.


5. Once liquid begins to boil quickly reduce the heat to medium (otherwise soy milk will boil over) and stir in your dry mixture a little at a time, blending as you go. Mixture will become very thick and start bubbling.


6. Reduce heat to low. Stir in the macaroni noodles and diced onion making sure all noodles are coated thoroughly in sauce.


7. Pour noodle mixture into a 10" casserole dish and sprinkle with breadcrumbs and a generous amount of black pepper. Bake uncovered for 30 minutes or until top begins to brown.

8. The result is a crispy on top creamy casserole with a mild cheesy flavor complimented by sweet crunchy onions throughout. The great thing about this recipe is that it's also versatile-
Tip: Try mixing in 1/4 cup vegan bacon bits before pouring into the pan. Not in the mood? Swap that for 1/4 cup minced sundried tomatoes and serve topped with fresh basil. Try it with a couple minced cloves of roasted garlic mixed in or sprinkle it with minced red and green peppers before baking like my friend Blake does. The options are endless!

Ofcourse, if you choose to serve it straight up make sure you add a couiple colorful side dishes like sauteed kale and yam fries for an all around American meal! Happy Comfort!

serves 4

Edamame Pâté

It's the end of the month and as my fridge becomes emptier and emptier I find myself getting creative with the items I've yet to use. This time around, the challenge was a forgotten bag of frozen shelled edamame.
Frozen edamame is a great thing to keep on hand. The in-shell variety makes a healthy snack fit for any occasion while the shelled edamame is handy for tossing into stirfrys, salads, or in this case, blending into a unique condiment.
I've tasted commercial edamame pâté and am never pleased with the results. I often find them over-seasoned or sometimes convoluted in flavor. This recipe creates a mild and delicately flavored spread that is easily paired with both asian as well as italian cuisine.


Edamame Pâté
  • 1 Cup frozen shelled Edamame
  • 1/4 Cup Pine nuts (I didn't have any on hand when I photographed this so I substituted cashews)
  • 3 cloves Garlic
  • 1/2 Cup fresh Parsley
  • 1 Tbl fresh Lemon Juice
  • 1/3 Cup Olive Oil
  • Salt to taste


1. Boil frozen edamame for 5 minutes till tender.


2. Meanwhile, roughly chop your garlic and parsley.


3. Drain edamame and rinse with cold water to cool.


4. Combine edamame, pine nuts, garlic, parsley, lemon juice, and olive oil in a food processor and blend thoroughly. The texture will be creamy and a bit gritty. You can add a tiny bit of water to make it smoother. Blend in salt to taste.


Edamame Pâté makes a wonderful spread for bread and crackers. The mild flavor makes it an innovative filling for tea sandwiches but the high quantity of garlic also makes it work with most basic sandwich ideas. It is also delicious tossed with noodles and served at room temperature. Try tossing with bow tie pasta and peas or  mix into soba noodles and top with sesame seeds for a delicious side dish. You can also top a salad with a dollop. The rich green color brings flair to a variety of dishes!

Makes about 1 1/2 cups

Make it your Own: Nachos!

Ever since my boyfriend moved in I've been finding myself serving more and more dude food for dinner. You know, pizza, nachos... My boyfriend gets more excited about mac and yeas' casserole than he does about say, african groundnut stew on bulgar. Luckily, I feel equally excited about both.
Even though the quickest junk dinners come from the frozen aisle at the grocery store, I find that many of them are nearly just as fast to throw together from home.
Thus, I present my quick and healthy nachos. A bag of chips provides a satisfying base for a can of beans, a couple handfuls of (vegan) cheese, and the fixin's are anything I have on hand in the fridge. Assembling them takes as much time as the oven does to preheat and they are a great way to use up leftovers such as rice or small bits of vegetables I might have lying around. The best part is, they are healthy! And much more fit for a meal than their traditional "nacho cheez sauce" smothered counterparts, don't you think?


1. For nacho night, pre heat the oven to 400 degrees and spread several handfuls of your favorite salted tortilla chips out on a baking sheet.


2. Chop up your fixin's! Nachos are a great way to use up random vegetables or leftover items in your fridge. Here are some of my favorites:

  • diced bell peppers 
  • chopped red onion
  • chopped scallions
  • diced tomatoes
  • chopped black olives
  • shredded cabbage
  • grated carrots
  • grated or diced zucchini 
  • leftover cooked rice
  • leftover cooked beans
  • minced garlic
  • diced jalapeno
  • chopped cilantro
  • diced avocado
  • cubed or crumbled fresh tofu
  • crumbled veggie burgers or your favorite mock meat

Toss on as many of these as you like. Chances are, you have quite a few of them around the kitchen. Make sure they are evenly spread over the bed of chips.


3. Open a can of your favorite refried beans. I prefer black refried beans but here I am using regular pinto. Empty the contents into a bowl and add about 1/3 cup of hot water.


4. Mix well and spread over your bed of chips. The water allows the beans to be distributed more easily. 


5. Cover the whole mess in grated (vegan) cheese. I like Daiya brand because it melts. Try the cheddar or the pepper jack. Or combine several.

6. Bake for about 7 minutes until the (vegan) cheese melts. Check it here and there. You don't want to burn your chips!


7. Serve hot with your favorite dips. I made fresh guacamole and also fresh roasted salsa using this recipe.

I make about these every other week. I store (vegan) cheese and commercial salsa in my freezer so I can toss these together any time I need to. Everybody loves nachos! And if you don't, get out.